
Converting Scans Made with Digital Cameras
Back to CNMY Invert
All scans made with a digital camera setup must be linearised prior to inversion with CNMY
To linearise your digital camera RAW files, you must use any tool that can output a linear raw 16bit per channel file, preferably in the tiff format, but other formats can work too.
In this guide, I will present my preferred methods for linearising digital camera RAW scans, and this is part of the method I use in my negative inversion subscription plan for clients who send in scans made with DSLR or mirorless cameras.
1. Method with Capture One
2. Method with Affinity Photo
Linearising with Capture One
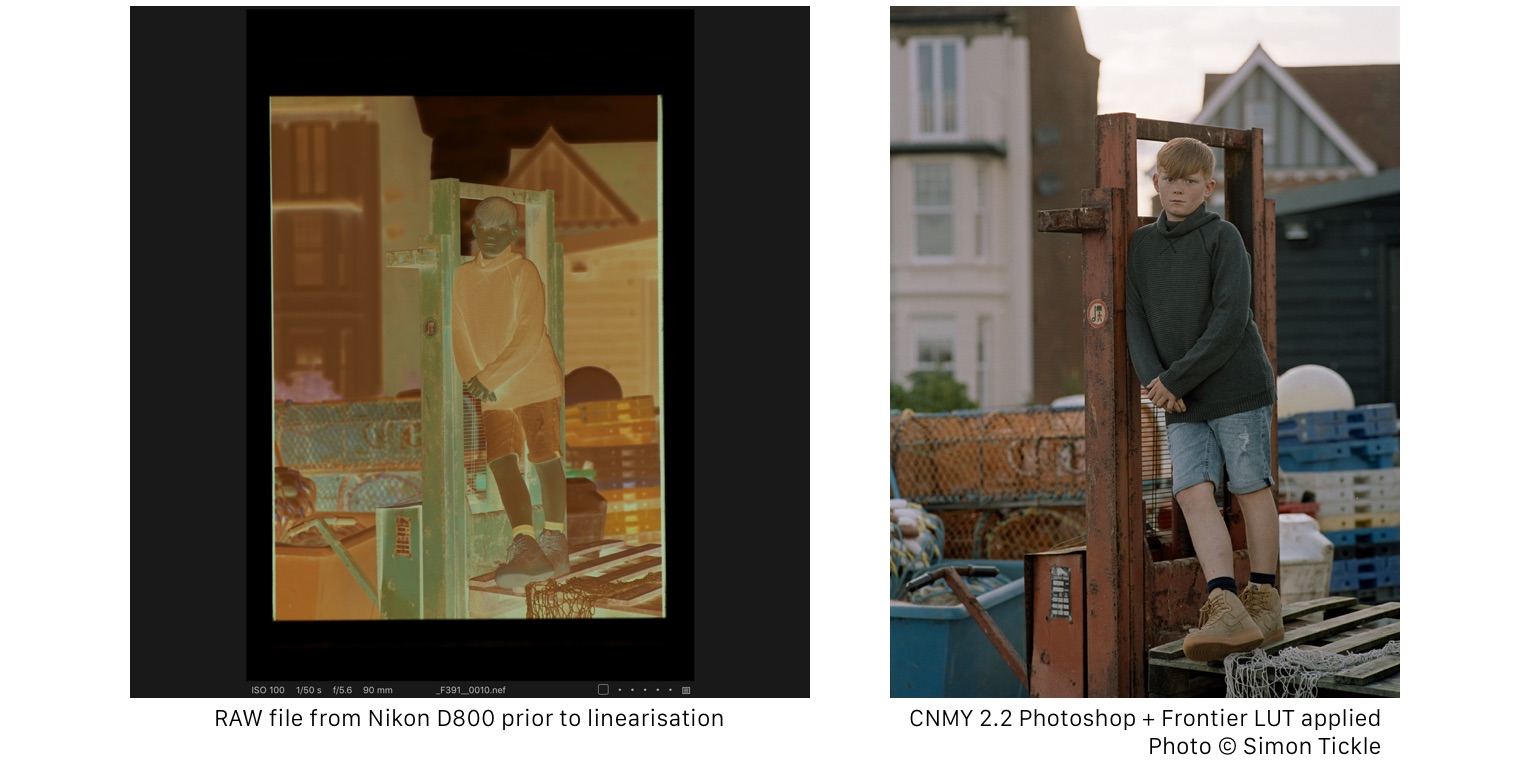
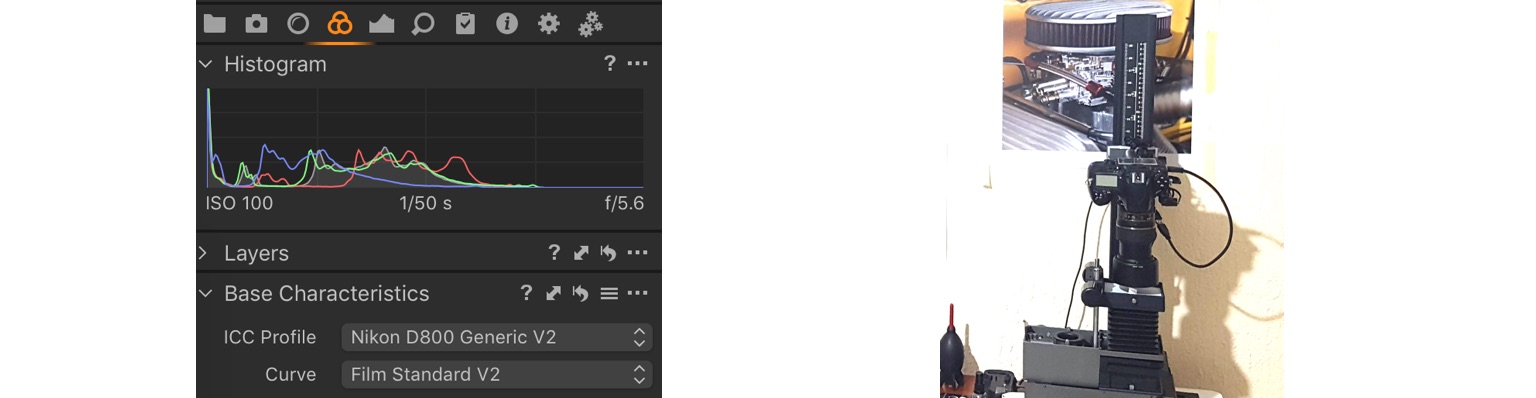
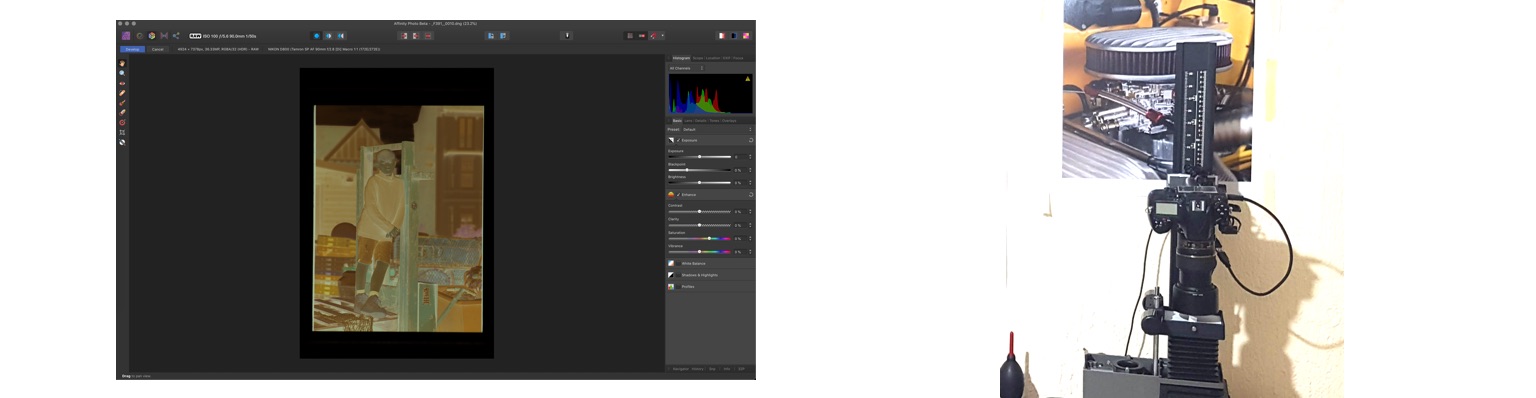
The first thing we need to do is open our RAW file in Capture One. For this guide, I will be using a Nikon D800 raw sent in by photographer Simon Tickle. You can also see a picture of his DSLR scanning setup using a color enlarger, with the camera shooting through the color head.
Once we have the raw opened, we will go to the Color tab. We're interested in the 'Base Characteristics' tool.
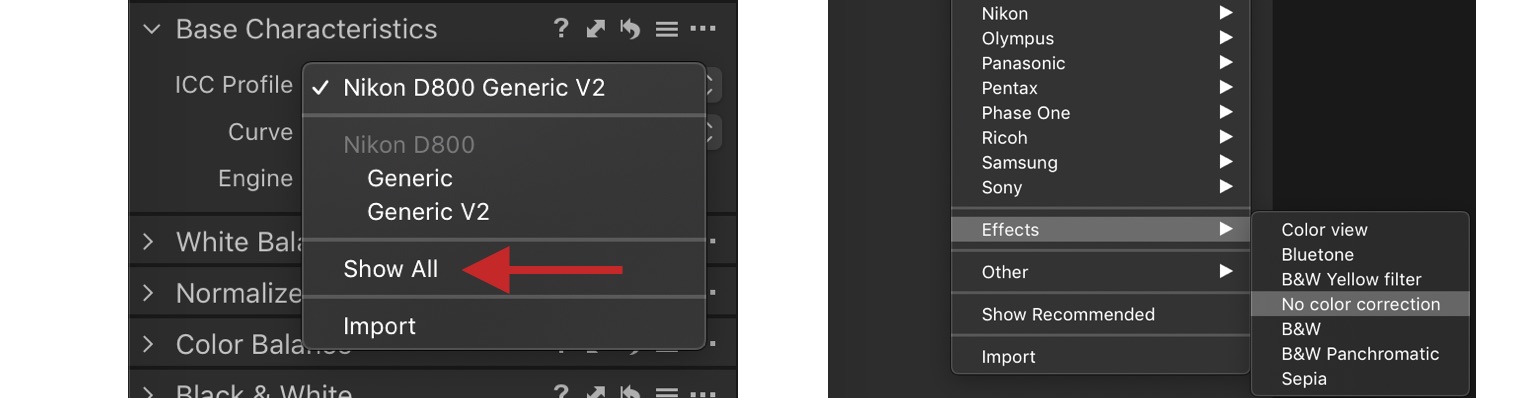
 We will click on the ICC Profile dropdown menu, and first select the Show All line.
Clicking on the dropdown menu again, we see several new options appear.
We will navigate to Effects and then select No color correction
 Next, we will click on the Curves dropdown menu, right underneath the ICC Profile menu.
We will select the Linear Response curve preset.
 As you can see, with these changes, the RAW preview has changed dramatically.
To bring up the linearised file in Photoshop, we right click on the RAW thumbnail, and select Edit With.
 We need to also make sure that the file we export is in the correct format (Tiff), the bit depth is set to 16, and all the other settings are left on their defaults (see my settings in the picture).
Many times, DSLR scans like these have excess areas around the frame, this can be sometimes too much, so it's a good idea to crop the file to a more manageable level once it is brought up in Photoshop.
Our linearised RAW is now ready to be used with CNMY just as we would with any other scan.
Linearising with Affinity Photo
The first thing we need to do is open our RAW file in Affinity Photo. For this guide, I will be using a Nikon D800 raw sent in by photographer Simon Tickle. You can also see a picture of his DSLR scanning setup using a color enlarger, with the camera shooting through the color head.
 When opening any camera RAW in Affinity, we are presented with its Develop module. This works as a preliminary step analogous to Adobe Camera Raw in Photoshop.
We need to navigate to the View menu and find the line called Assistant Manager
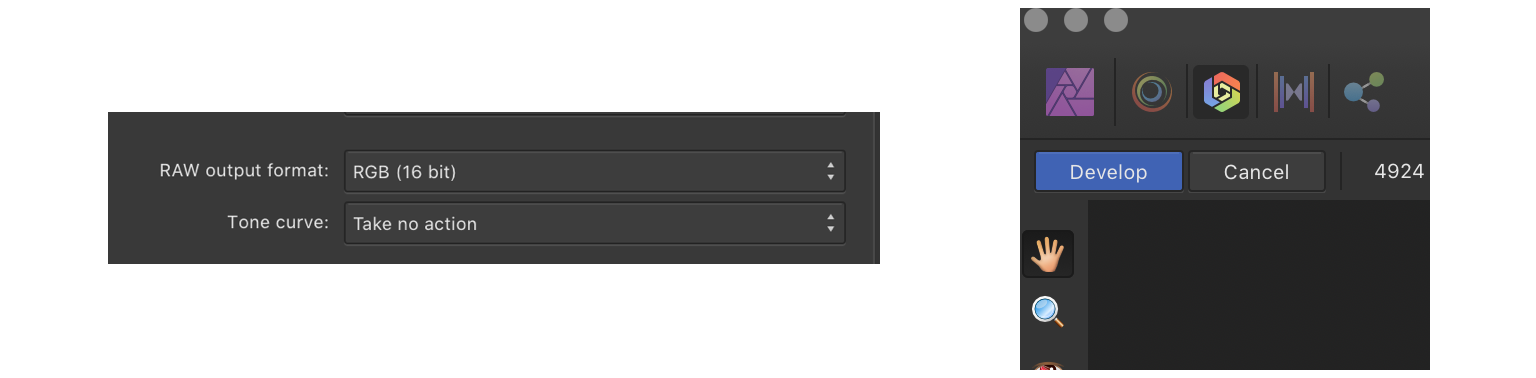
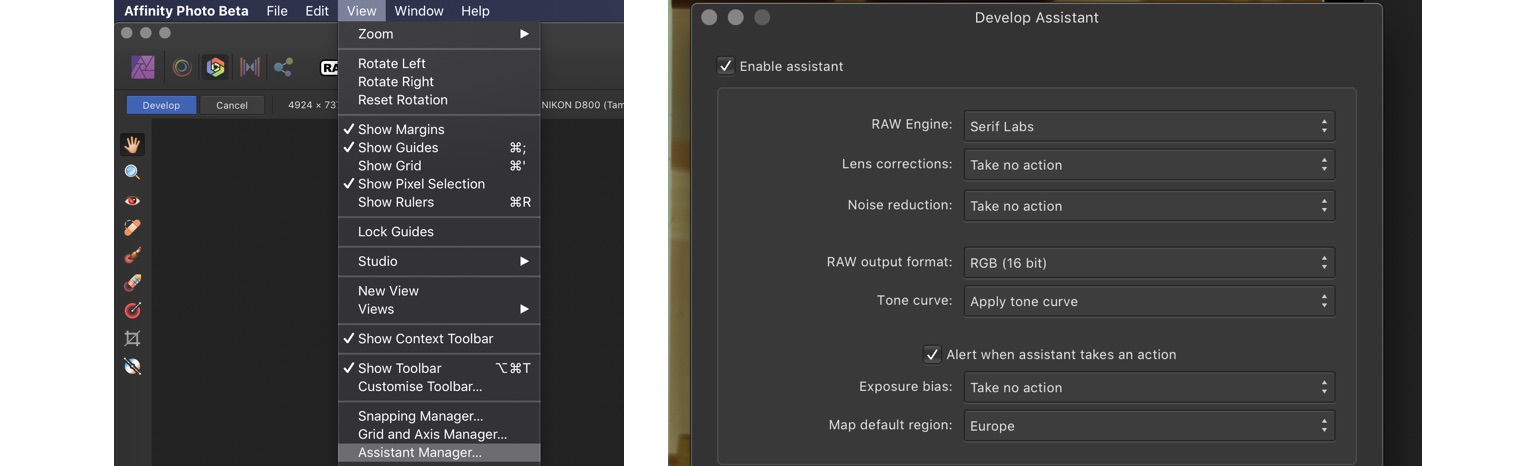 We will change the Tone curve setting here to Take no action.
Make sure the RAW output format is set to 16bit RGB.
We leave all the other settings untouched and click on the Develop action in the top left.
 From here, we can either use the CNMY macro set directly in Affinity, or save the file in the tiff format and edit in Adobe Photoshop. I tend to favour the Photoshop version of CNMY for DSLR scans.
If we choose to convert the image in Affinity Photo, we have to make sure we crop the image and leave in just the actual film frame. Some additional color balance with the included optional Manual CC set may be needed.
//